Monday, December 26, 2011

Holiday Twist Out

This is a redo of my holiday twist out post. I made a mistake and deleted it today while trying out the blogger app. The purpose of this post was to give an update on how I'd been keeping up with my hair during the busy holiday season.

I wore my hair in twists and pinned them up in different styles for a few weeks and then wore a twist out. The twist out lasted for about two weeks and I was able to wash my hair while the twists were in.

For more information on how I accomplished and preserved these styles, see my Wash With Twists In and Twist Out Results posts.


Day 3:


Day 14 (ignore the camera date):


Thursday, October 13, 2011

Swag vs Foolishness

Swag vs foolishness... If you can recognize the difference, you will definitely enjoy this song.  It's nice to see positive messages coming from the Hip Hop community.  I try not to be too political on my website, but it's been hard keeping my comments to myself with the foolishness going on in our community lately.  This song covers a lot of it.  Please listen to the lyrics because there is a good message in this song that a lot of us need to hear.  Thanks David Banner!


Later

Bantu Knot Out

I decided to attempt the bantu knot out again this week and it turned out great (If I must say so myself)!  I didn't have any issues with my hair drying over night and the curl definition was amazing.  This time around, I decided to try a different method.  Before I got started I wet my hair a little, detangled it and blow-dried it out.  I did about 25 bantu knots all together.  I applied a little moisturizer to each section and I used a little foam wrap as I twisted the sections to form the knots.  For each bantu knot, I flat twisted the roots down and then began twisting my hair to form the bantu knots.  This made a huge difference in how my hair turned out.  It made my hair easier to separate into smaller curls as I removed the knots and it kept my roots from being poofy/frizzy.  If you put your hair into fewer knots this will really make a difference for you.  Especially if your roots are turning out really thick and you're only getting definition towards the end of each section.  Also, when taking the knots down, I used plenty of hair glossing polish (oil will work too) to separate the hair.  You can choose not to separate the hair so that the style lasts longer, but separating the hair gives your hair more body.  Here are the pics that I took today.  I forgot to get a pic of the knots because I was in a rush this morning.  I will add more pics tomorrow showing the actual knots.

Day 1
1011010844a
1011010844
1011010842b


Day 2 (I put four knots in the front overnight and used the pineappling technique on the rest of my hair)


1012010618b
Curl definition after separating one knot.  Amazing!!!
 1012010622
1012010813
1012011128

Sunday, October 9, 2011

Elle Varner

Wow! I can't believe that I'm just hearing about Elle Varner because I love her new single that is out (I Only Wanna Give It To You) as well of some of her other songs currently on YouTube.  She is very talented, so if you haven't heard about her yet, you will probably be hearing more about her soon. Check it out...


If you haven't noticed, she's also a natural gal! I love her hair in the video.  I'm so happy to see more and more natural women in the forefront these days.  It's such a great thing for our young girls to see that beauty comes is so many forms.  I love it!

Saturday, October 8, 2011

Something Like a Frohawk!?!

Last night, I put my hair into bantu knots, hoping that I could rock a bantu knot out today.  Well, I didn't quite have enough time for my hair to dry and I wasn't in the mood for a hat day.  At first, I figured I'd just wear a cute curly puff, but after playing around with my hair, I thought it would be a great day to try the frohawk.  I've never tried it before, but my boyfriend has been trying to get me to wear my hair in a frohawk for a loooong time, so I finally gave in.  I think it turned out pretty well considering the fact that I didn't have too many other options.  Take a look.

1008011409a
1008011413c
1008011414a
1008011410a
1008011414

How I did it:

First, I separated a section of hair in the front so that some of my hair could fall into my face and sort of spike up.  Second, I put a little conditioner and moisturizer on my edges to smooth them down and pulled my hair back sort of like I would for a puff.  If you have a banana clip, that would probably work better. Third, I separated some of the pieces of hair and shaped it the way that I wanted it.   Then, I took the front section and let some of the hair fall in my face and some fall toward the puff so that you couldn't see where the two separate.  Last, I pinned back some of the hair from the front to really merge the front and back and to make my edges look neater.  If you haven't tried this style, you definitely should.  I probably wouldn't wear this to work, but it's very fun for the weekends.  Hope you enjoy it. 

Later

Thursday, September 29, 2011

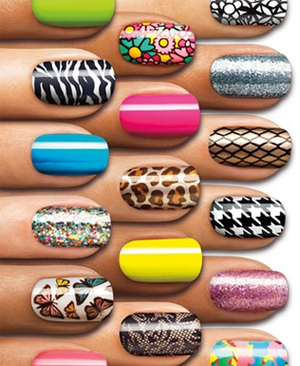
Sticky Fingers

My sister told me about this stick on nail polish a while back, but I didn't pay much attention to it because I don't really do nail polish.  Yesterday, she finally got me to try it out and I actually like it.  Because it's a stick on nail polish, it goes on in seconds and there is no dry time.  Also, its really easy to get off.  This is really great for people who like to change up their nails all the time or people who have little time to do their nails.  I can see myself using something like this on the weekends before going out, just to switch it up a bit.  The video has all of the color options as well as the instructions for how the strips are applied.


Later

Tuesday, September 27, 2011

More Flat Twist Out Pics!

I have more flat twist out pics as promised so that you can get an idea of how your flat twist out may turn out.  The results can vary depending on the type of product you use, the amount of product you use, the texture of your hair before putting the twists in, etc.  I will try to describe the method used for each of these although some of these were from some time ago.

This was the second time that I did the flat twist out.  I blow dried my hair out and added plenty of Shea butter to each section before twisting it.  This method gave me larger ringlets/waves and my hair looked longer because it was blown out really well. 

This twist out had been in for at least a week and as you can see it's snow all around.  It wasn't snowing outside, but my hair did get wet while skiing that week, so my curls became tighter as the week progressed.  I used plenty of Shea butter on these curls as well, which really helped with fighting frizz.

For this twist out I had been wearing a puff that week and my sisters and I were busy planning my mom's 50th birthday party.  The night before the party I had no time to wash my hair, dry it and put the twists in, so I took a short cut.  I moisturized my hair really well, wet it a little and blow dried it out.  It was still pretty thick after I blow dried it, but it turned out great. 


This is the latest twist out that I showed in my last post.  I had already washed and blow dried my hair about a week before I actually did this to attempt another style, so I didn't bother to do anything to it before twisting it.  I used Shea butter and foam lotion to do these twists.  The foam wrap helps give the hair a little extra hold when it dries.  I did these really late at night and I new that I had to take them out early the next day so the foam wrap really helped with the fact that I couldn't leave the twist in that long.

more and more...

As you can see one style can yield different results depending on how you do it, but I love all of the results that I have gotten from this style.  I hope that you enjoy this style as well!  If you have any flat twist out pics that you'd like to share, please send the pics to me via email with flat twist out in the subject line so that I can post them.

Later

Flat Twist Out Results!

In my last inspiration post, I said that I would be posting pics of the flat twist out that I've been wearing for the past two weeks.  For those of you who don't know what a flat twist out is, it's a method similar to cornrowing (with twists instead of braids) that can be used to give your hair a curly look.  As I mentioned before, this is a great way to achieve big curly hair with little effort.  I like to do my twist outs on stretched or blow dried hair because I enjoy the results much better when my hair is straighter before I style it.  I can't say that this is my best twist out, but I will say that no matter how different my hair turns out when I do this style, I always love it.  Take a look...


ft 092011 1
This is day one of the twist out.  I apologize for the pic quality.  These pics were taken with a camera phone.
 
ft 092011 2
Here is a more detailed look at the curls.  Again, the camera does not do my curls justice.
ft 092011 3
Here is the back.
ft 092011 4
This is also day one after my hair has fallen a bit. 
ft 092011 5
This is at the end of week two.  I did not re-twist my hair the night before. 

I did have to re-twist my hair most nights to maintain this style, but you can definitely skip a night here and there and use the pineappling technique that I showed in my Twist Out Results post.  Yes, you will loose some definition, but it gets bigger and looks just as good.  If you do use the pineappling technique, you should use a tighter headwrap at night, such as a do-rag to better preserve the curls and minimize frizz. Great for the weekend when you get in too late to feel like twisting up a head of hair.  Also, when taking out the flat twists, I usually do not separate the pieces of hair because it makes it easier to put the twists back in at night.  However, if you like your hair bigger, you should separate the pieces for a more dramatic look.  I learned this technique from Curly Chronicles' YouTube Tutorial  and I love this style. So, please check out her videos if you're interested in trying the flat twist out.

I'll probably post a few pics later today of some of my older flat twist outs just to give you an idea of how it may turn out for you.  Results may change depending on the amount and type of products used as well as your hair texture.

Saturday, September 24, 2011

Tracee Ross

You may remember Tracee Ross for her starring role in the sitcom Girlfriends or maybe you just know her as the daughter of famous singer Diana Ross(there's definitely a resemblance).  I can't say enough about Tracee Ross and how much of an inspiration she has been to me as a natural woman.  I love her hair and her overall style.  She is always well put together, but she isn't afraid to have fun with her look. Her hair and style are the perfect blend of freedom and sophistication.  Take a look...


Tracee Ellis Ross

Tracee has more of a loose curl pattern, which is quite different from mine, but her hair styles are still attainable for all natural women if you know how to take advantage of the versatility of natural hair.  I will be posting some pics of a recent flat twist out, which is one way to get the big curly look that Tracee is rocking in some of the pics above. 

Later

Sunday, August 14, 2011

Twist Out Results!

So, I finally got around to taking my twists out after several weeks.  The night before I took them out, I conditioned my hair with Garnier Fructis Sleek & Shine conditioner and then followed up with a vinegar rinse.  When my hair finished drying the next morning, I applied Optimum Oil Therapy Moisturizer and Proclaim glossing polish for a little sheen. This is a perfect example of why twists are such a great style - during the week you can have a chic updo for work and on the weekend you can let it all down for a twist out.  Here are the results:

Day 1:
100 0828
I am using a very thin band to keep my hair off of my face.
100 0839
There curl definition is there, but somewhat tight because the twists were very small. I did stretch the twists using a ponytail overnight, which helped out with the length. 
100 0837
Washing my hair with the twists in, allowed the ends to curl up perfectly in the back.  The ends on the top half aren't as curly because I pulled them back to dry.  In the future I may use two ponytails on the top and bottom sections for stretching. 
100 0888
To preserve the style I recommend using the pineappling technique.  To do the pineappling technique, put your hair into one or more ponytails higher up on your head and then cover it with your usual hair wrap overnight.  In the morning, you can do a fluff with a little moisturizer and be on your way without additional styling. (Note: Ignore the headband, that was still up there from earlier that day.  I don't wear that to bed.)

Day 2:
0814011742
This is from day two with my camera phone.  As you can see, it's not very clear.

100 0885
This is still day two, but with my regular camera. You can see the curl definition much better here.


I had more pictures of how the style lasted throughout the whole week, but my SD card got damaged and I lost the photos.  Next time, I will try to show the results for the full week, but take my word for it,  it really can last for the full seven days.

Later


Thursday, August 4, 2011

Wash with Twists In

Yesterday, I finally got around to washing my hair with the twists in.  I just did a quick co-wash with Garnier Fructis Sleek and Shine Conditioner.  I just wanted to do a quick post to show the results of how the twists look after a wash.  Here are the pics:

100 0806
Yes, that is Sister Act on TV.

 100 0810
 
100 0816

As you can see, the twists are still in tact.  I put some shea butter on my hair, put it into two ponytails and used banding to prevent shrinkage while air drying.  The next morning my hair was pretty dry, but there were some areas that were still damp.  When I finally remove the twists, I will post pics of my twist out. 

Later

Saturday, July 30, 2011

Featured: Kendra

283361 2280634093785 1186772780 2840675 4821126 n
My first flexirod set... came out pretty nice!!!


Natural Hair 101:  What sparked your decision to go natural?

Kendra:  The versatility....u can be happy and nappy one day and silky straight the next.....and of course for the health of my hair.

Natural Hair 101:  How long have you been transitioning?

Kendra:  Since Oct. 2010....sooo about 9-10 mths.

Natural Hair 101:  What's your staple style?

Kendra:  Bantu knots....so easy to do right after a wash, then let air dry.

267342 2280633293765 1186772780 2840672 1244077 n
Week old bantu knots... Laundry day I was being lazy with my hair


Natural Hair 101:  If you had to choose one hair product to do it all, what would it be and why?

Kendra:  Sheamoisture's organic raw shea butter restorative conditioner w/ sea kelp, argan oil and shea butter because it can be used as a leave in, a daily moisturizer and deep conditioner. oh yeah, and it's a great detangler!!!!!!

Natural Hair 101:  What do you find most challenging about maintaining natural hair?

Kendra:  I would say finding the right products and a routine that works for u and your type of hair...and finding cute styles that arent time consuming.

Natural Hair 101:  What advice do you have for those who are transitioning?

Kendra:  My advice to those who are transitioning would be: do your research, get educated about the products that are good for your hair and those that aren't.

270147 2280632053734 1186772780 2840665 3459210 n
bantu knot out

Friday, July 29, 2011

Yaya Dacosta

Many of you may recognize Yaya from Cycle 3 of America's Next Top Model.  She finished second in the competition and went on to have a successful acting and modeling career.  Enough about her career though, I'm in love with her hair!  I believe she's been natural her entire life, and she definitely knows what to do with her hair.  She sports the best updos and she does a great job with making her natural hair look chic.  She's definitely an inspiration!  Take a look.


Yaya+costa
George Napolitano/FilmMagic.com
Yaya+costa
 

I have to try one of these styles soon!